Rear Ladder Kit
Jimny roof access, sorted.
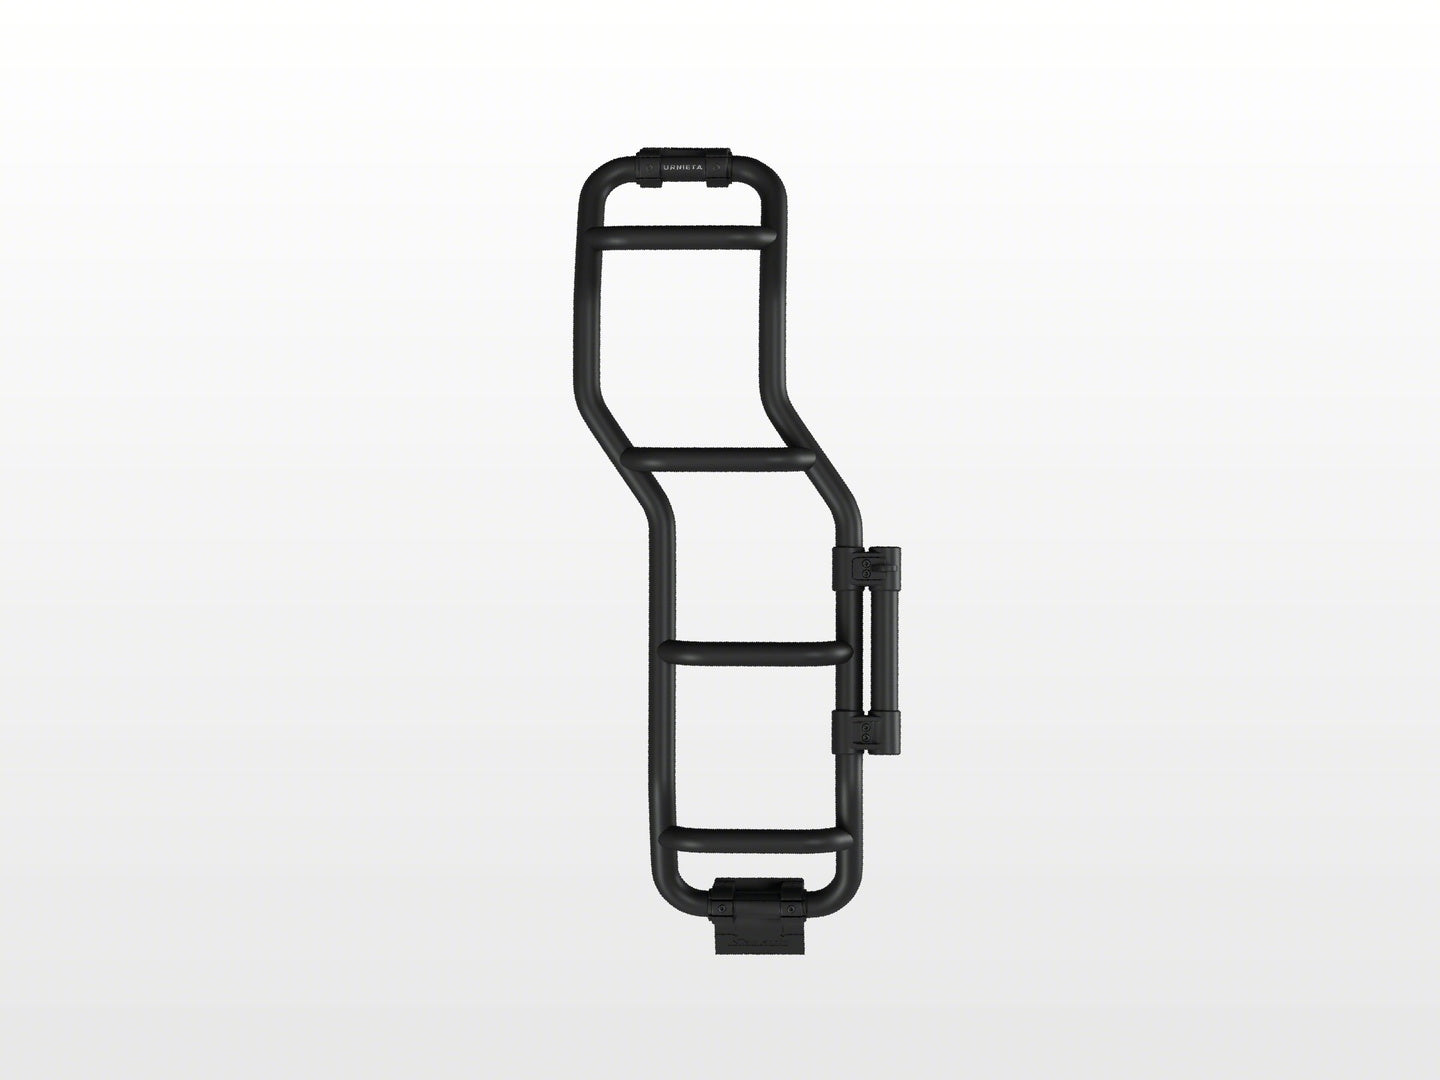
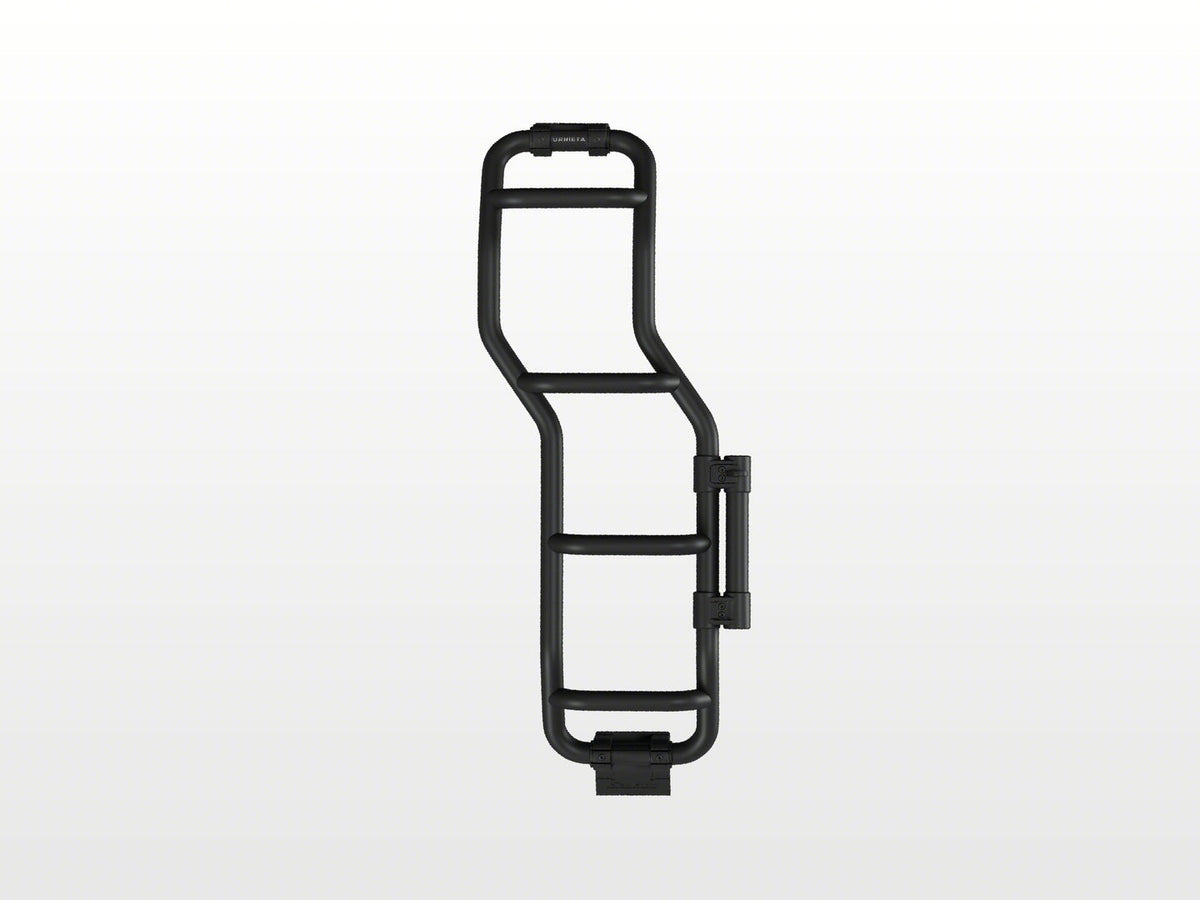
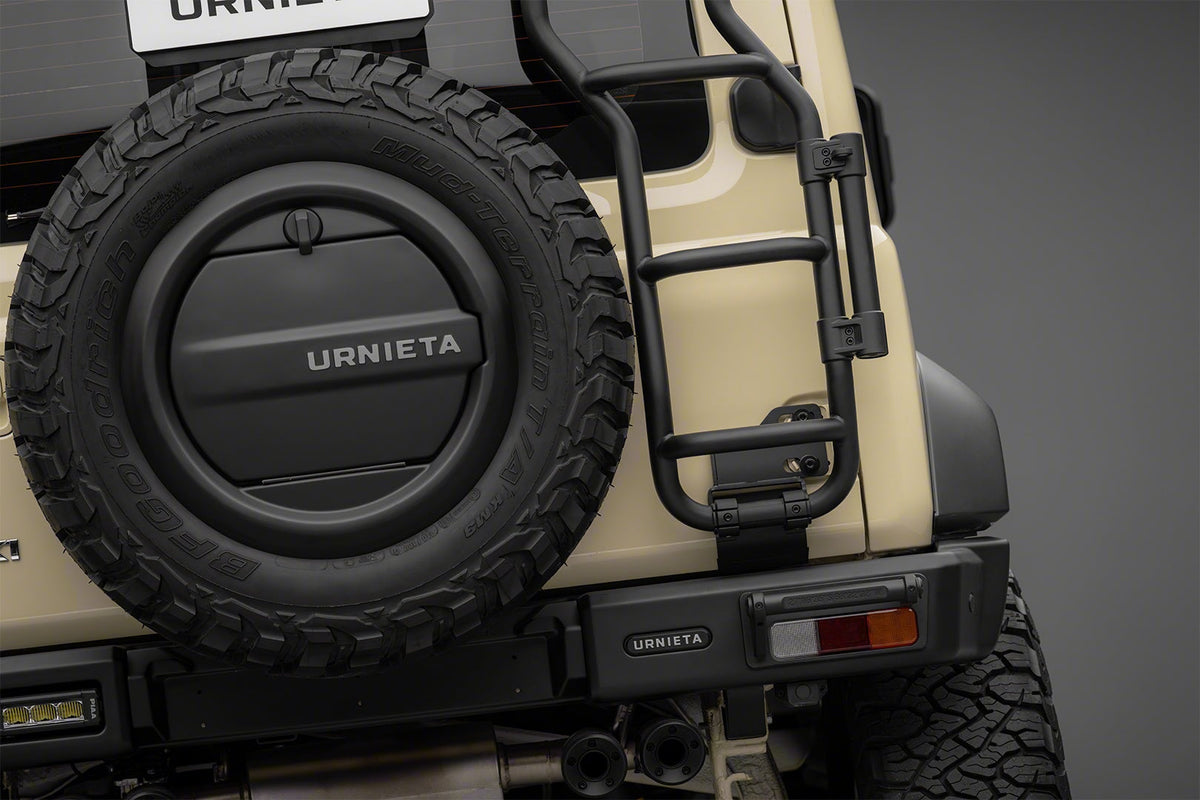
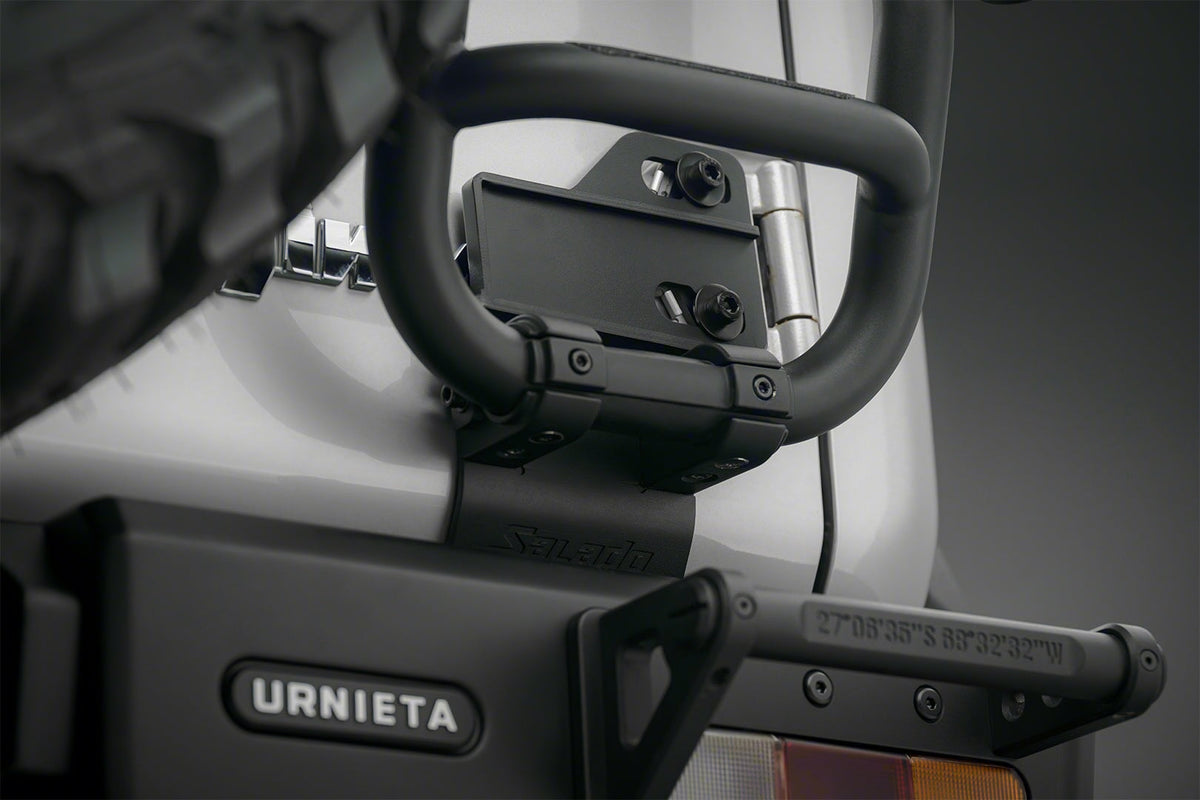
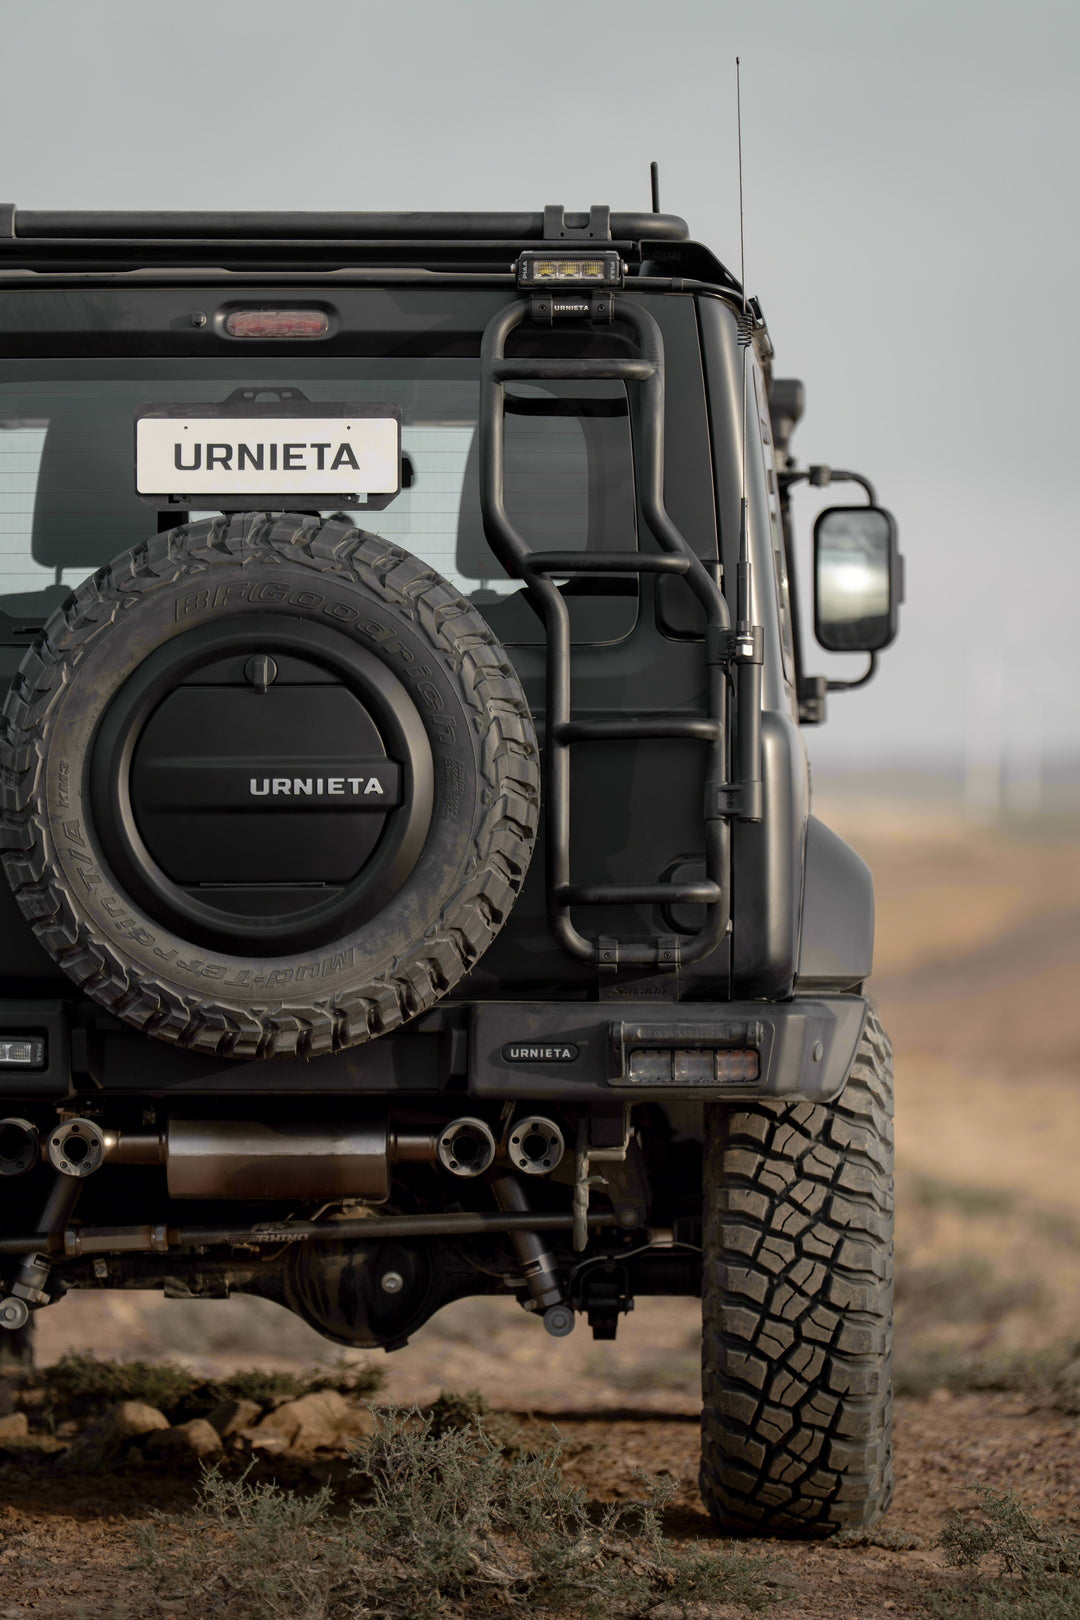
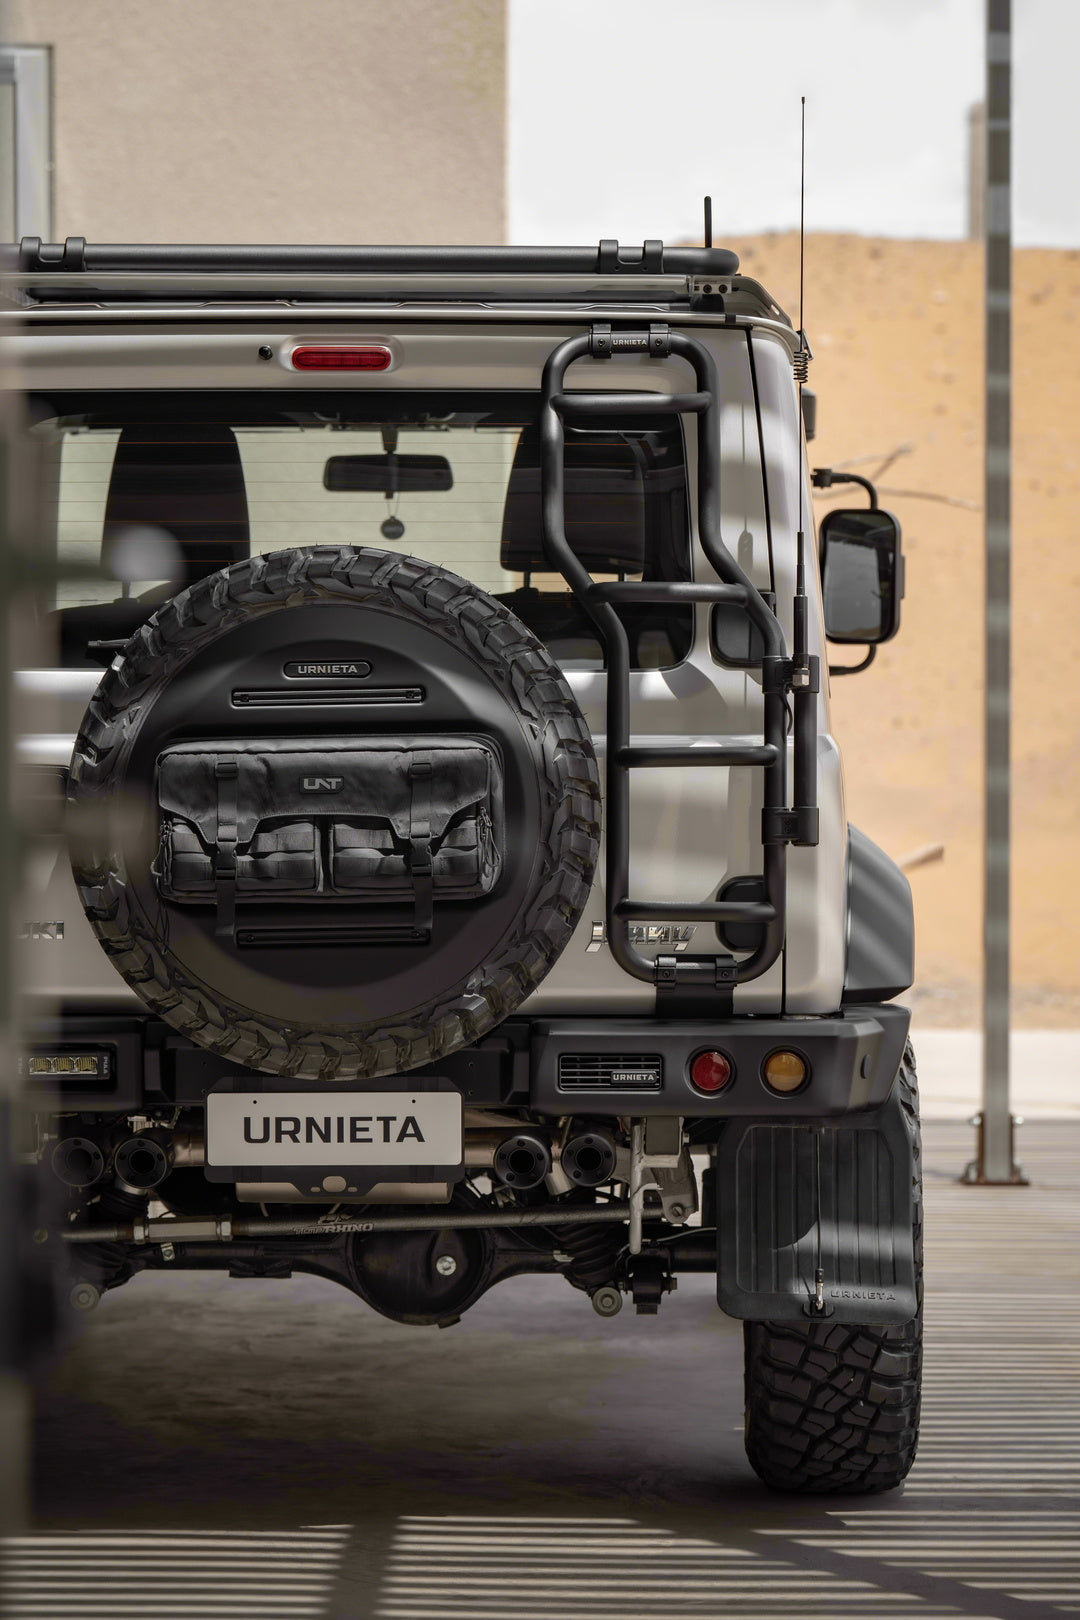
The URNIETA SALADO Rear Ladder Kit is engineered for the Jimny JB74 / JC74 / JB64, combining up to 235/75 spare-tyre clearance, an anti-sag bracket, and multi-function mounts with design-led fitment and high-end build quality. Roof-rack access is completed at the tailgate with ladder geometry, 235/75 spare-tyre clearance, anti-sag support, and flag, antenna, and light mounts.
Item code: URN-SAL-LAD-JIM

Roof access made simple.
The Jimny's compact dimensions make it a brilliant little off-roader, but getting up to a rooftop rack or tent without a proper ladder is awkward at best and risky at worst. This rear ladder kit from Urnieta is designed specifically for the Jimny, bolting directly to the rear of the vehicle for a secure, stable step-up every time.
Whether you're loading gear onto a roof rack after a long day on the tracks or climbing into a rooftop tent at camp, having a dedicated ladder means no more clambering up the spare tyre or bumper. It's a small addition that makes a genuine difference to how you use the vehicle.
Designed for the Jimny.
JIMNY-SPECIFIC FIT
Engineered to mount directly to the rear of the Suzuki Jimny, no cutting or major modification required.
ROOF ACCESS
Provides safe, stable steps to reach your rooftop rack, cargo or tent with confidence.
CLEAN INSTALL
Designed to sit flush and purposeful on the rear of the vehicle, without looking like an afterthought.
Vehicle fitment.
Installation overview.
POSITION THE LADDER
Offer the ladder up to the rear of the Jimny and confirm alignment with the mounting points.
SECURE THE MOUNTS
Fasten the ladder to the vehicle using the supplied hardware, ensuring all fasteners are torqued correctly.
CHECK AND TEST
Confirm all fixings are tight, then test the ladder with your body weight before use on the road or at camp.
Spec it
your way.
Not sure which setup suits your build? Get fitment advice, install guides, or talk to the PVS team before you buy. We are Sydney based and here to help.